Monday, December 18, 2023

Last Project of the Year!

My goal was to do one quilt per month this year. Yes, that is an ambitious goal! 


But that never happened. I did make 11 quilts! And numerous other projects, too! My son asked for me to make a pillow out of his tee-shirt as I was working on the shark quilt. 


I thought I would get to this project in the new year, but that didn't happened. The plan is to surprise him at Christmas!

Tuesday, December 12, 2023

Sharks are Coming!

 My neighbor's youngest son loves sharks!!  Ever Halloween for the past two years he has been a shark.


When I saw Elizabeth Hartman's Social Sharks quilt pattern, I knew that I had to make this quilt! And I knew who would love the quilt too!


After cutting out my blocks, I did my first shark, the test shark.


All those envelopes were my method of keeping the blocks and the sequence in order for assembling the sharks. The sharks aren't difficult to do, just a lot of steps.


The most difficult part was forming the teeth. I found that if I cut the white last block larger it was easier to cut the block to proper size. 


The easiest part of this project was arranging the fabrics, which would become the sharks bodies.


I first did all the right facing sharks and followed up with the left facing sharks. The background fabric is a very light blue. 


And the back of quilt is Sharks. Lots of them, too!!


Saturday, November 18, 2023

Bookworm


That is what my neighbor's 8 year old son is, a bookworm. 


A couple of years ago, he had asked me to make him a quilt. Back then, I didn't know his interests. I knew he loved watching sports. 


And he loved to ride his bike, but that was it. This year I found out that he loves to read! 


So after seeing Angela Pingel's Book Nerd pattern at a local quilt store, I decided that this year I would surprise him with that quilt he had asked for.  This was a paper-piecing project, which are not one of my favorites to do. If ever I were to do this project again, I would modify her pattern: no cornerstones, just sashing strips. 

Sunday, October 15, 2023

A Different Finish

This was a first for me. 


As I was finishing up the quilt-as-you-go blocks, I realized that the border needed something too.


I thought what would be different and add to the quilt.  I researched crochet borders on quilts and came across a tutorial by Elsie Gray: https://www.youtube.com/watch?v=uM4_I1h81p0. Her crochet borders are so pretty and the tutorial easy to follow that I knew I wanted to give it a try with this quilt. 


First, I researched different types of crochet finishes. I found the linen stitch that would work great using different colors to complement the postage stamp size blocks.  The back of quilt is entirely black, also another first for me.


I haven't crochet in years; so, this took me a week to get done. I will try this again when left with an edge that needs something different from the traditional quilt borders. 

Sunday, September 17, 2023

49x49=2401


Working on a quilt that will have 2401 postage stamp size squares! There will be 49 large blocks with 49 small squares in the block. I have 21 blocks done!!!

Tuesday, September 12, 2023

Dangers of Sewing


Made a mistake of getting my finger too close to the needle while sewing a modified zigzag stitch. I'm still amazed at how much the needle bent. My finger suffered a deep cut that took over a week to heal. 


I'll have to learn to use one of these!!

Friday, August 25, 2023

Cottage Garden

I love seeing a patch of densely blooming flowers. I also love cottage gardens. In my own garden, I have drought tolerant plants that form areas to create the look of a cottage garden. Each year I add new and different flowering drought tolerant plants in those areas to form a more densely cottage patch. 


This year, I have been inspired by my garden to make numerous quilts with flower motifs.


After seeing these beautiful batiks in a jelly roll, all I could think of was flowers and half-hexis.
Twice now I have arranged hexagons to make quilts with a flower theme. One quilt I did as a quilt-as-you-go and that quilt went to a friend in Japan. The other quilt I own and has a very wide border that is quilted with arcs.


After arranging the hexagons into flowers, I stitched them into rows and then the rows were stitched together. I opted out of doing this quilt as a quilt-as-you-go. Instead I basted the layers in prep for quilting.


I decided to go with arcs, but no borders. 


It took a week for me to quilt the arcs. The arcs represent the blowing of the wind through the flowers.


I opted for a blue binding with a pink flange instead of a border.  I'm into using flange bindings this year for most of my quilts.


The back of quilt is this pretty floral flannel. Come dead winter when I'm in need of "Spring" this quilt should keep me warm.


In my own garden, I have a rose that is a green flowering rose. The quilt has one green flower with a green center that represents my green rose in my cottage garden.


Saturday, July 15, 2023

Hawaiian Hanabi

This quilt for my daughter was inspired by her resent "I want-to-get-away" trip to Hawaii and her love of Japanese fireworks, Hanabi. 

While she was in Hawaii, I came across just by chance the Missouri Star Quilt Co's Youtube tutorial on the Burst Block quilt. It's a totally tiki look, Hawaiian vibe!


I ordered the Burst Block template, along with all the 10 square batiks and blacks that I needed to use for the blocks.


I picked out colors that gave me a Hawaiian feel of ocean, land, vegetation, and lava.


I had to watch the tutorial a couple of times to pick up important tips on placement of the template. The black 10 squares got cut as shown above and the colored batiks were cut in half as shown above. The black triangles and batik triangles are placed right and left side from center black cuts. 


After sewing the batik triangles to the black center, the ruler is placed first on right side with the single dot/line on the sewn seam and the template's small tip as close to the center black's tip while keeping the line on the seam. Cut on right side of template. The cut off triangle fabric is set to the right side to keep order for future placements and cuttings of right side block.


After right side is cut, flip ruler so writing is down, as in above photo. Again match up single dot/line with seam and small tip as far down as possible to center bottom, and then cut on left side of template. 


Single dot/line is goes with first seam, two dots/line with second seam, and three dots/line with third seam. It is important to make sure the small tip of template is as close to the bottom tip of the black center, which helps in keeping consistency of the bursts. When working on right side of block, the template is placed with words read correctly. And when working on left side of block the template get flipped so the writing is down. Also very important in making the blocks, one needs to keep the fabrics for right side of block on right and fabrics for left side of blocks on the left. 

Squaring up the block is done by cutting off the excess fabrics as shown above. Having a rotating mat was also helpful in cutting and squaring up blocks.


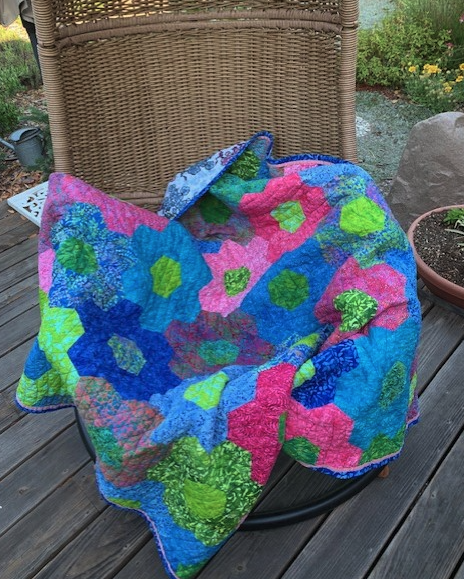
After all blocks were assembled, I then arranged the blocks for the effect of ocean, sand, land, and lava.


The back side is 108" width fabric that reminds me of fireworks. Since the back was all the one fabric and I used that same fabric for the binding, I added a white flange on the back side to give the back more bling and charm.


Saturday, July 1, 2023

Wall Flower

 I saw the Wall Flower quilt on Missouri Star's Instagram post back in February and I immediately knew that I wanted to do this pattern as a quilt-as-you-go. I even liked the yellow and blue batik fabrics that they had used for that cute quilt.

So I ordered my mini peel, Heat & Bond Lite Sewable, Kona White Ten Squares, Floral Wave Batik Ten Squares, Batik backing fabric, and 5" x 15" ruler. The ruler made cutting the 10" squares down to 5" so much faster; I love this ruler. I just followed the Missouri Star tutorial on Youtube for the pattern and easy instructions.


I used yellow thread for the yellow based batiks and blue thread for the blue based batiks to stitch around the petals. 


I quilted each block individually since I was doing a quilt-as-you-go. I had gotten half way through quilting the blocks when I realized I wanted to make the Prairie Flower quilt for my son. (Yes, I watch a lot of Missouri Star Youtube.) So, this project was set aside for three weeks while I worked on my son's birthday quilt. 


Second week in June I finished all the quilting, arranged my quilted squares, and stitched them together.


One inch sashing was used to cover the seams on the backside of quilt. Since I didn't want any additional stitching/quilting lines to show on the front side, I hand stitched all of the sashing strips down. Hand stitching is not one of my favorite things to do, but for this project it was a must do.
 

 I finished the quilt with the flange binding method that I'm enjoying to use on my quilts this year.


Thursday, May 25, 2023

Prairie Flowers

 My son is living in Phoenix for a couple of years.

 He has tried growing some flowers on his apartment deck with no luck in the heat of the summer. 


He recently purchased a hammock for the deck instead of investing in more plants that just die from the heat. 


For his birthday, I'm going to surprise him with flowers that should never die.


I love watching Missouri Star Quilt Company's Youtube videos.


Recently, I saw the Prairie Quilt video and I immediately thought of my son, prairie flowers with yellow centers and green leaves.


I decided to quilt in arcs to show movement, the wind.


It looks great on my hammock!