Sunday, October 22, 2017

Scottie Dogs and Scraps

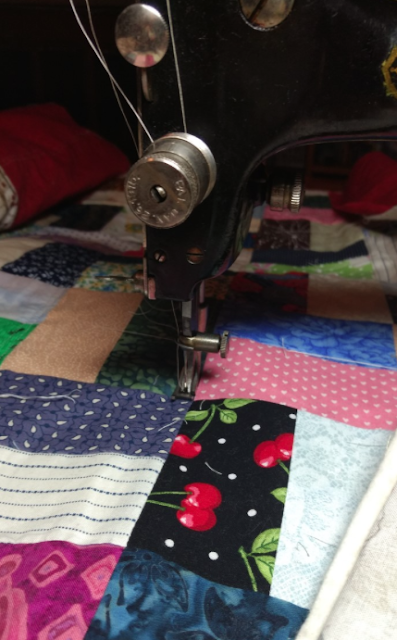
Finally finished the scrappy quilt yesterday! Since I was dragging from getting the flu shot the day before, I didn't feel like doing much over the weekend. So, I finished off the quilted quilt that had been sitting for weeks on the sewing machine waiting for the scrappy binding to be sewn onto it.


The back of the quilt has a Scottie dog and newspaper theme. I made sure all those cute Scottie dogs were well taken care of with the center square being a fabric with newspaper motif.


After completing the quilt, I then curled up in the warmth of the quilt and watched my favorite you-tubers for the rest of the day.

Sunday, July 23, 2017

Scrappy Jean Quilt


I been indoors staying cool this past weekend. Way too hot, temperatures were in the high 90s. I started this quilt top a couple of months ago. I then ignored it while I went on camping trips, visited family back East, and worked on some gardening projects. There are 360 small squares and 30 jean squares that I had cut and needed to be pieced. Well, this weekend I felt motivated to assemble the quilt top. I had seen a similar quilt made with jean material on Pinterest. When I saw that quilt, I knew that I wanted to make that design since I could use my scrap materials along with the jean material from my stash.


The backside will be the doggie and newspaper print fabric. Next, I will have to figure out how I want to quilt it.  

Tuesday, April 11, 2017

One Totally Scrappy Quilt

I thoroughly enjoyed this project. Assembling and quilting each block created from scraps of fabric and batting scraps was an extremely rewarding process.


Just knowing that my huge scraps of fabric and batting piles were dwindling as I worked on both sides of the quilt brought me enormous joy. Those piles had grown so large that they took up the entire half of a closet. Yes, there were enough scraps of fabric for both sides of the quilt.


I even found leftover binding strips in my pile of scraps that I was able to use to bind this quilt.


I'm now down to one large bin of scraps.  The scraps of batting has diminished, but I still have enough to use in a future quilt-as-you-go project. 

Monday, April 3, 2017

A Peek

I'm almost finished the Garlic Knot quilt.


I thought I would share a couple of photos of the work on the border.


Three different machines were used to assemble the borders and then attach the borders to main quilt. Here are photos of just two of the machines used, Davis and Singer 224.

Tuesday, March 7, 2017

Transformation of the Garlic Knot

The next step in assembling the quilt was joining the quilted garlic knot blocks together. By using sashing strips that were pieced together to form an additional pattern, the quilt design changed from just the garlic knot pattern to the present design.


Black strips of fabric were used for the back of the quilt's sashing. Since the focus was on the placement of blocks for the front of the quilt, the back of the quilt's pattern just turned out this way. 


Next assembly will be the borders. 

Monday, February 13, 2017

42 Blocks


Assembling a garlic knot block doesn't take very long.  


Setting up a sheet as a reference for the order of the squares that make up the block was very helpful.


After some thought, I decided to add a border around the garlic knot design of the quilt. I really like the look of Bonnie Hunter's quilt. So instead of 56 blocks that I had planned on making, I now have 42 blocks that form seven rows with six blocks to a row. 


With all the blocks done and positioned in rows, the design looks like chain link fence.  Now I need to work on the sashing strips that are used to join blocks together and will change the look of what I presently have done.


Monday, January 23, 2017

Garlic Knot

After seeing Bonnie Hunter's Garlic Knot quilt, I realized that quilt could be assembled using the quilt-as-you-go method. I just needed to come up with a block size and figure out the measurements for the individual pieces that would make up a garlic knot block.


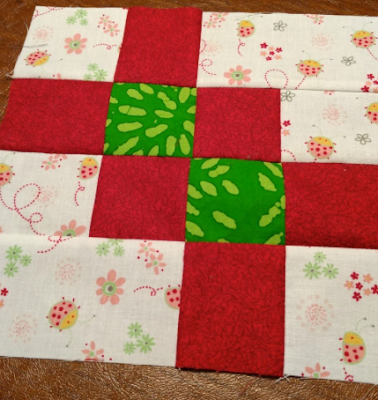
The sashing strips that hold the blocks together will be the strips that Bonnie used to separate each garlic knot block in her quilt design. Since sashing strips in a quilt-as-you-go covers a portion of the blocks to hold blocks together, I needed to make sure that the perimeter squares of a block would be equal in measurement to the inner squares of the block once the blocks are joined together by sashing. This means that the perimeter pieces of the block will initially have different measurements from the inner blocks. I picked a finished 8 inch block with strips between blocks to be 1 inch in width once finished. If I were just making a block, I could have made the block with 2.5 x 2.5 squares and sewn the blocks to the strips between blocks. Since this is a quilt-as-you-go, I had to make changes to keep squares in proportion for a finished 8 inch block. The inner squares are cut at 2.5 x 2.5, the corner squares 2.75 x 2.75, and the inner perimeter squares 2.75 x 2.5. Since two pieces that make up this block are rectangles, those pieces measure 2.75 x 4.75. After piecing, the block size is a 9 inch block, which will become an 8 inch garlic knot block after joining blocks together.

Next step was coming up with a design for the backside of the quilt. I could have just used large pieces of fabric for a block, but this year I want to use up a lot of my scrap fabrics. I decided on a string quilt backing. Since I have lots of scraps of batting that needs to be used up too, I sewed strips of fabric onto the batting.


I wanted the quilting to be simple, quick, and easy to do. So after layering the garlic knot block onto the string pieced block, I quilted straight lines to bring attention to the garlic knot pattern.


I'm planning on making the quilt 63 x 72. One block completed and 55 more blocks to assemble!


Monday, January 16, 2017

First Finish 2017

Yeah! First quilt of the new year completed!! This scrappy quilt has only taken me six months to get it finished. It's been over a year since I did any quilting with my Davis. Sitting down to quilt with this vintage beauty was like having tea with an old friend that I hadn't seen for awhile. She had waited patiently for me. She treadled so smoothly--it was like we had worked together just yesterday.


Then came stitching down the binding with a decorative stitch from Singer. She also performed effortlessly.


I had put a yellow flange on the backside of the quilt to dress the back up and bring out the yellows in the Chickadees.


My father loved watching and feeding wild birds, and his favorites were the Cardinals and Chickadees. My mom loves Bittersweet, and the berries in the design looks like American Bittersweet. So when I saw this fabric, I knew I must have it to use in one of my quilts.


The bird fabric could have been used as large blocks to give the back of the quilt a more pieced, pattern look, but I just wanted to get the quilt done.


Many of the scrapes came from my mom, but there are many that came from me. I plan to make this year the year of scrappy quilts since I have a large stash of fabrics.