February, I think of candy hearts. For years, I have wanted to make a quilt with hearts for the month of February.

This year, I made it happen.
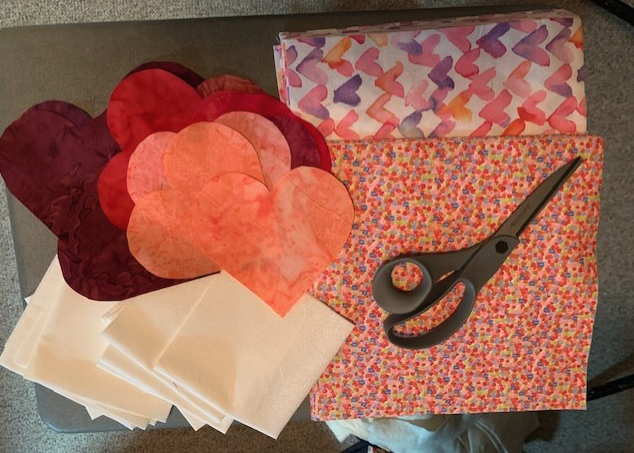
I started at the beginning of the month by cutting out my hearts from 5 inch batik squares that I got from Missouri Quilt Co in mid January. At first, I wanted to use a printed pattern with vintage, Valentine motif that Missouri Quilt Co was selling, but I was too late on that deal. The remaining fabrics came from Joann Fabrics since there was an awesome sale on fabrics. I cut 10 inch squares for front and back fabrics.

This quilt is another quilt-as-you-go quilt since I wanted to use up remnant batting and also make it easier quilting. Much easier to quilt a 10" block with curves through the machine than maneuver an entire quilt.

So, I got busy zigzagging batting pieces to together for the 10 squares to be quilted.

Next, came centering the hearts and machine stitching the hearts down onto the tops, white 10" squares.
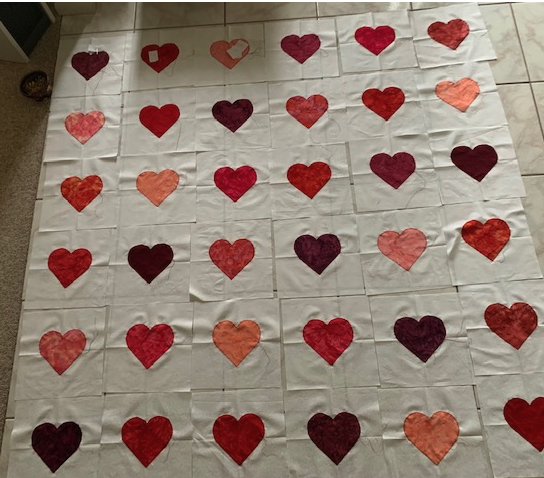
Hearts were arranged, numbered (36), and placed with back squares that also had been arranged.

Squares were then sandwiched (top, batting, back) and quilted with my Davis Feed walking foot machine. I love that machine!

Threads were knotted and then sewn under, between top fabric and batting.

Stashing strips were cut, top 2" (little red hearts) and bottom 1.5" (white). I assembled the blocks with the back stashing first. I tried something different for the assembling of the quilt-as-you-go blocks on this quilt.

After a row was formed, I then stitched down the top stashings.

I decided to bind the quilt with the flange binding technique of stitching in the ditch.

Most of the binding is purple with a little corner of red. The flange portion is mainly pink with just a little bit of orange.

My mom loved the "red hots", cinnamon red hearts. She would buy them every Valentine's Day instead of the candy hearts with the little messages. This quilt has both, minus the messages--those are for one to dream about.


